
As Lishi auto lock tools are designed for use in door locks , there exists a number of models of car that do not house all of the wafer positions within the door lock , ie nissan NSN14 locks , these will house 8 wafers in the door lock but the full 10 wafers within the ignition .
So once we have picked and decoded the door , it is necessary to progress the info we have in code software to find the 2 missing key cuts . in this part of the guide i attempt to show you how simple this procedure is .
I use instacode as my chosen code software .
As this guide is more about the progression than it is the picking , ive concentrated more on this .
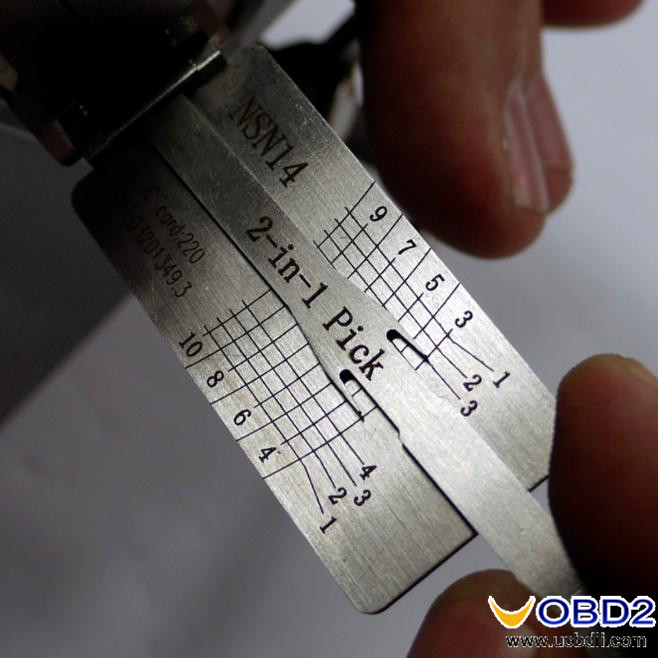
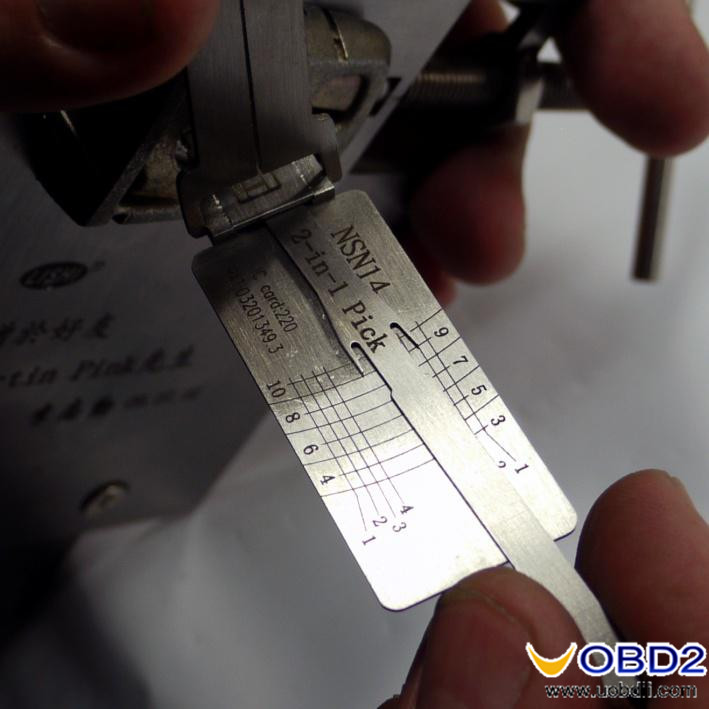
Picking and decoding the NSN14 lock using the lishi 2in1 single lifter then progressing the final 2 cuts using instacode .
The nissan NSN14 lock has
10 wafer positions
4 key heights
The door lock only houses 8 of the 10 cuts , the door lock houses positions 3 through to 10 .
Nissan models using the NSN14 keyway that have the powered eccentric ignition are slightly different , these have 11 wafers in the ignition with the 1st cut always being a No 3 , this system has ;
11 wafer positions
4 key heights
The door lock houses 8 wafer positions in positions 4 through 11 .
During this guide we will pick open then decode the Nissan NSN14 lock this will give us 8 of the 10 cuts required , we will then progress this info using instacode to find the missing 2 cuts and give us the correct 10 cut key .
The lock doesnt always respond to sequence picking , but in tests it does favour picking positions 3 , 5 , 7 and 9 first then once set pick positions 4,6,8 and 10 .
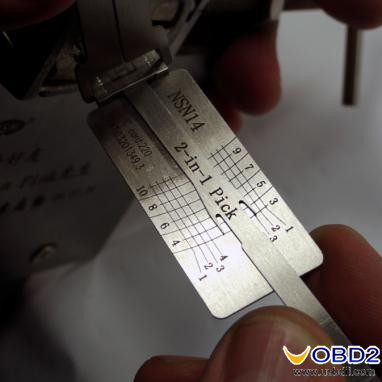
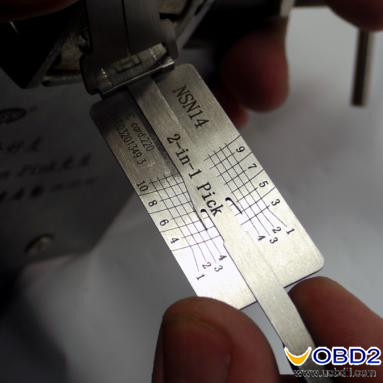
Picking and decoding the Nissan NSN14 door lock using Lishi NSN14 2in1 tool
Center the lifting arm so it doesn’t snag and fully insert the tool into the door lock .
Once inserted we pick positions 3 , 5 , 7 and 9 until fully set by tickling each position to find the binding wafer , once we find a bouncing wafer we pick it until set , once positions 3579 are fully set we then pick positions 4,6,8 and 10 until the lock opens
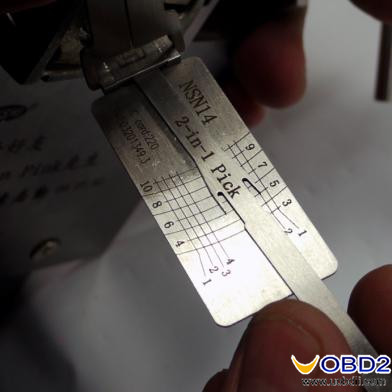
So we start with positions 3,5,7 and 9 in their binding order ;

Position 3 is first to bind and pick position 5 is next to bind and pick

Position 7 is next to bind and pick position 9 is next to bind and pick
Once position 9 picks the plug is felt rotating a fraction which confirms positions 3 , 5 , 7 and 9 are fully set , i confirm this by checking each of these positions to ensure all are slapping tightly .
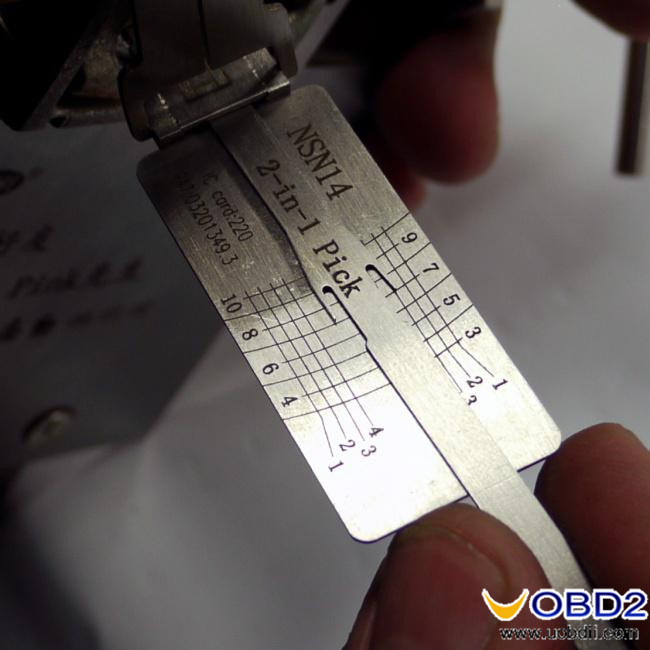
We now concentrate on positions 4,6,8 and 10 until the lock opens ;

Position 6 is the next to bind and pick position 8 is next to bind and pick

Position 10 is next to bind and pick
As position 10 picks the lock opens , as we didnt need to pick position 4 we know instantly that this is a No 4 cut .
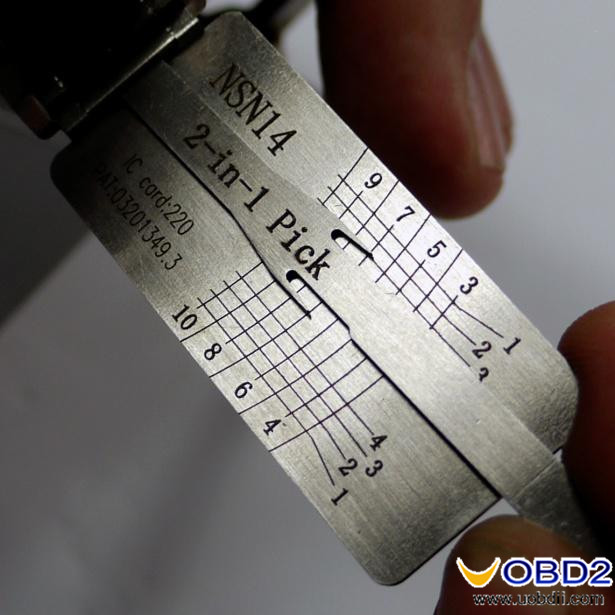
We now hold the lock in the open position via the tension arm , we then run the decode in the same direction as we picked , by moving the indicator arm along the vertical numbered position line , until the indicator stops , it will stop on one of the numbered horizontal key cut lines, this will be your key cut .
Position 3 is a No 3 cut position 4 is a No 4 cut

Position 5 is a No 2 cut position 6 is a No 1 cut
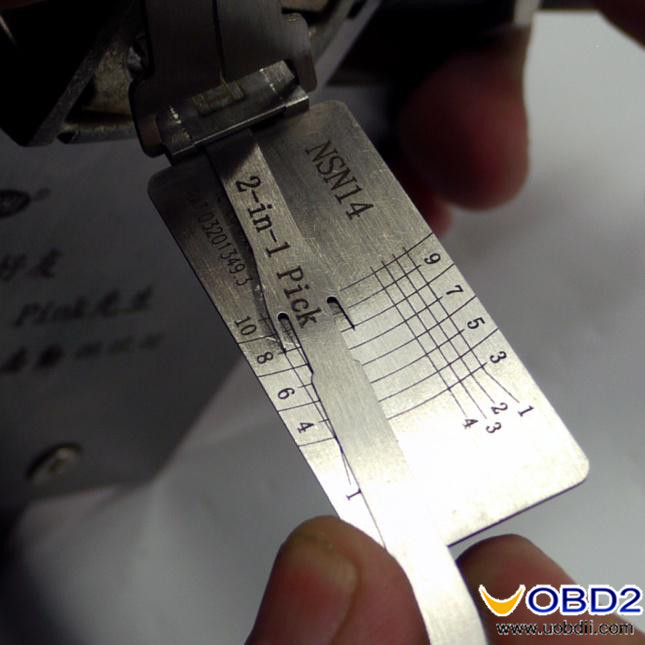
Position 7 is a No 3 cut position 8 is a No 1 cut

Position 9 is a No 2 cut position 10 is a No 3 cut
So we have cuts 3 to 10 from bow to tip of 34213123 , we now need to find the missing cuts for position 1 and 2 , we do this by using code software like instacode .
First we go to Instacode , we select either the car make and model and year or we choose silca nsn14 , we then select find bitting and enter the cuts we know in positions 3 to 10 which is 34213123 as in below diagram .

We then click next and get the next screen
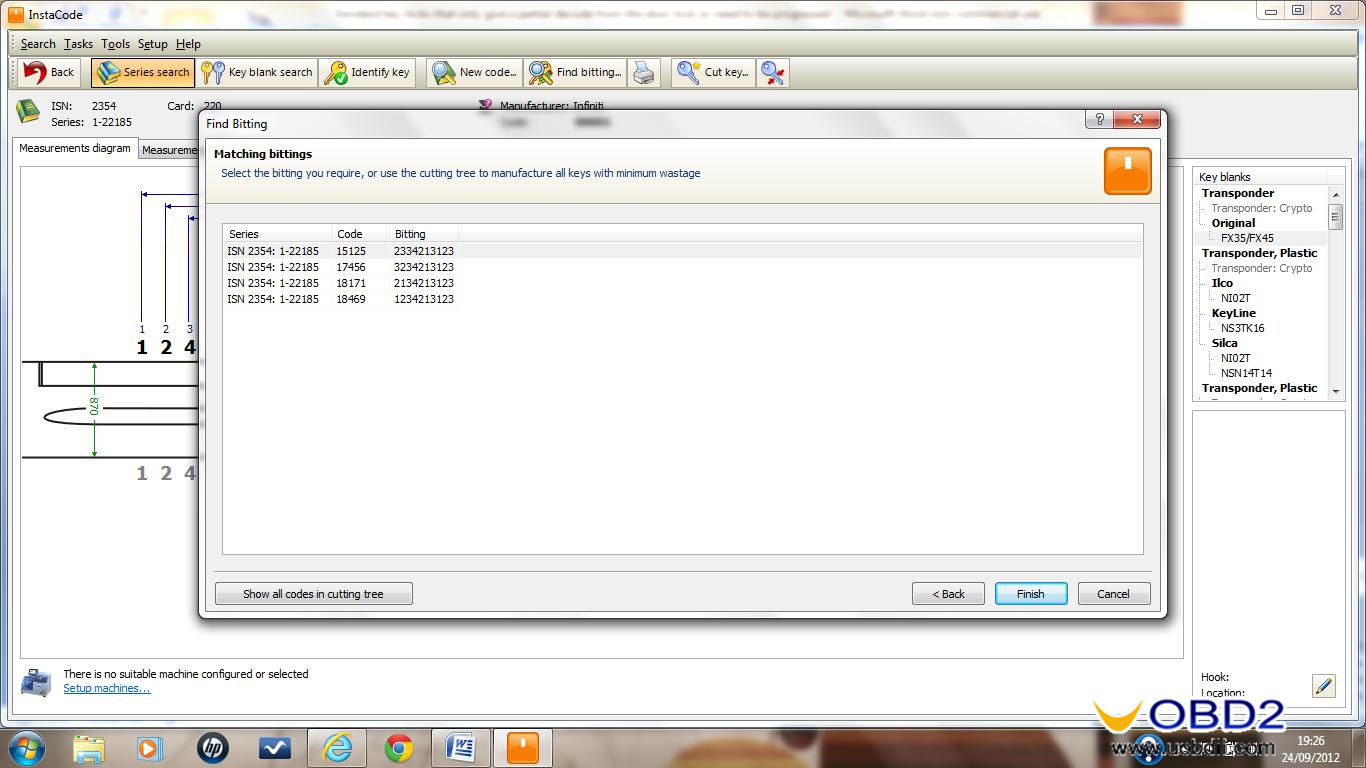
As you can see this gives us 4 possible keys , key blanks can be expensive to waste , so instacode helps with this , we click the show cutting tree tab , this shows us worst scenario how many key blanks we need to get the correct key and which order to cut these in , as below ;
You will see that we need a maximum of 2 blades as worst scenario .
There are other ways to progress these without using 2 blades via impressioning , there are 2 ways of doing this , we will start with the scenario we have instacode and have the possible codes as above .
Code 15125 , 2334213123
Code 17456 , 3234213123
Code 18171 , 2134213123
Code 18469 , 1234213123
So if impressioning , we cut the key on our cut to code machine as , 1134213123.
Insert this key into the ignition and turn right and jiggle up and down , do this a few times .
Remove the key and inspect positions 1 & 2 , we are looking for marks , if one position has marked , then this position needs cutting to next depth , if both positions have marked then both positions need cutting down .
If using the info above if just the first position marked , then this confirms the 2nd position is a No 1 cut , so looking at what we have above , if position 2 is a 1 cut then it can only be code 18171 so we need to cut position 1 down to a 2 .
If not having instacode , we cut each position that marks down 1 cut , we then clean with wet n dry , and reinsert into ignition , turn and jiggle again , we then inspect positions 1&2 again , any position that marks needs cutting down 1 cut again .
Repeat this process and you will reach the correct key .
Whether progressing via instacode or impressioning the last cuts its a quick simple process to complete .
Once done we have the correct key for the lock .
Procedure if fitted with the 11 cut powered eccentric ignition
There will be no difference with regards the picking and decoding process of the door lock at all , other than remembering the positions marked on the tool will be incorrect.
The tool will suggest you are picking and decoding positions 3 to 10 , when in fact you will be picking and decoding positions 4 through 11 instead , this wont affect the picking process , but will become important when progressing via instacode to find the missing cuts .
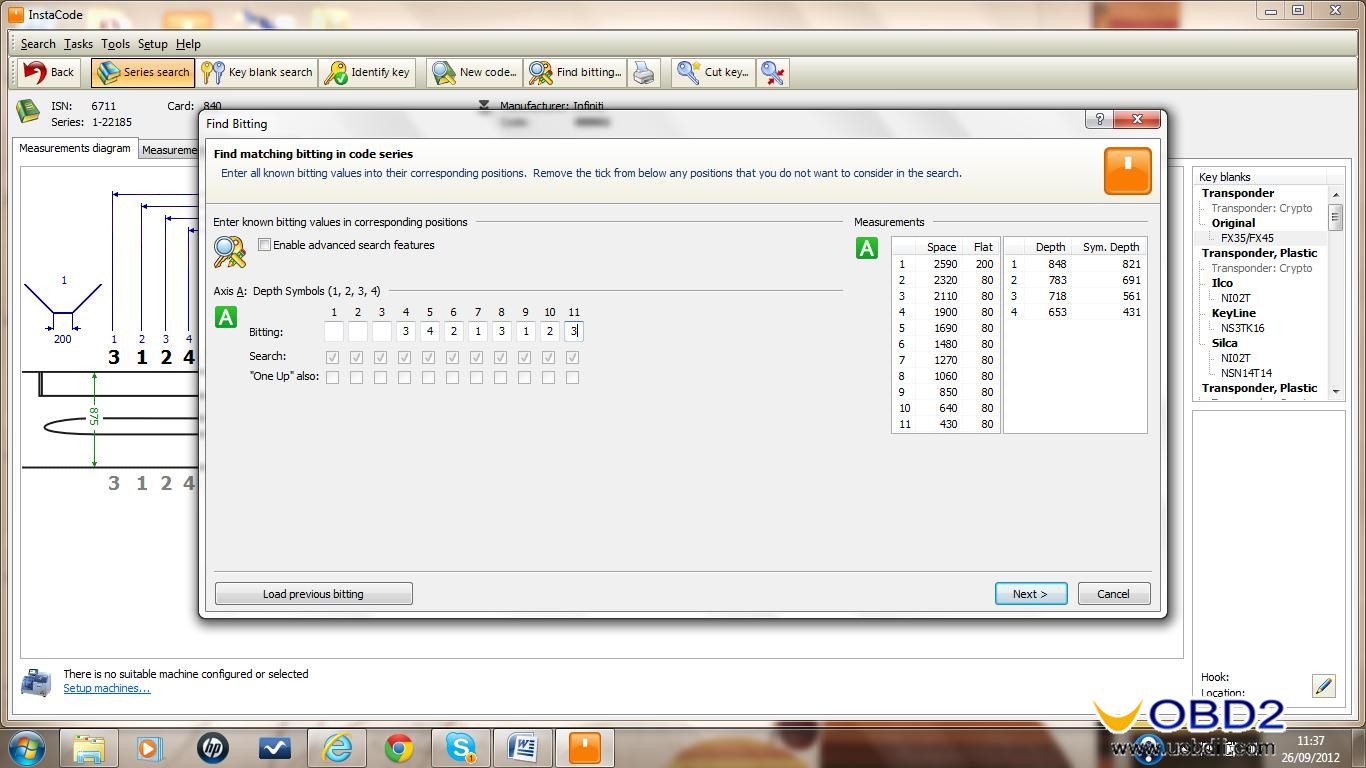
With our decoded cuts in the above guide of 34213123 , we would select the 11 cut NSN14 version on instacode , then select new biting , we would then insert the known cuts into positions 4 to 11 instead of 3 to 10 as before as in below diagram.
Then click next to see the below screen
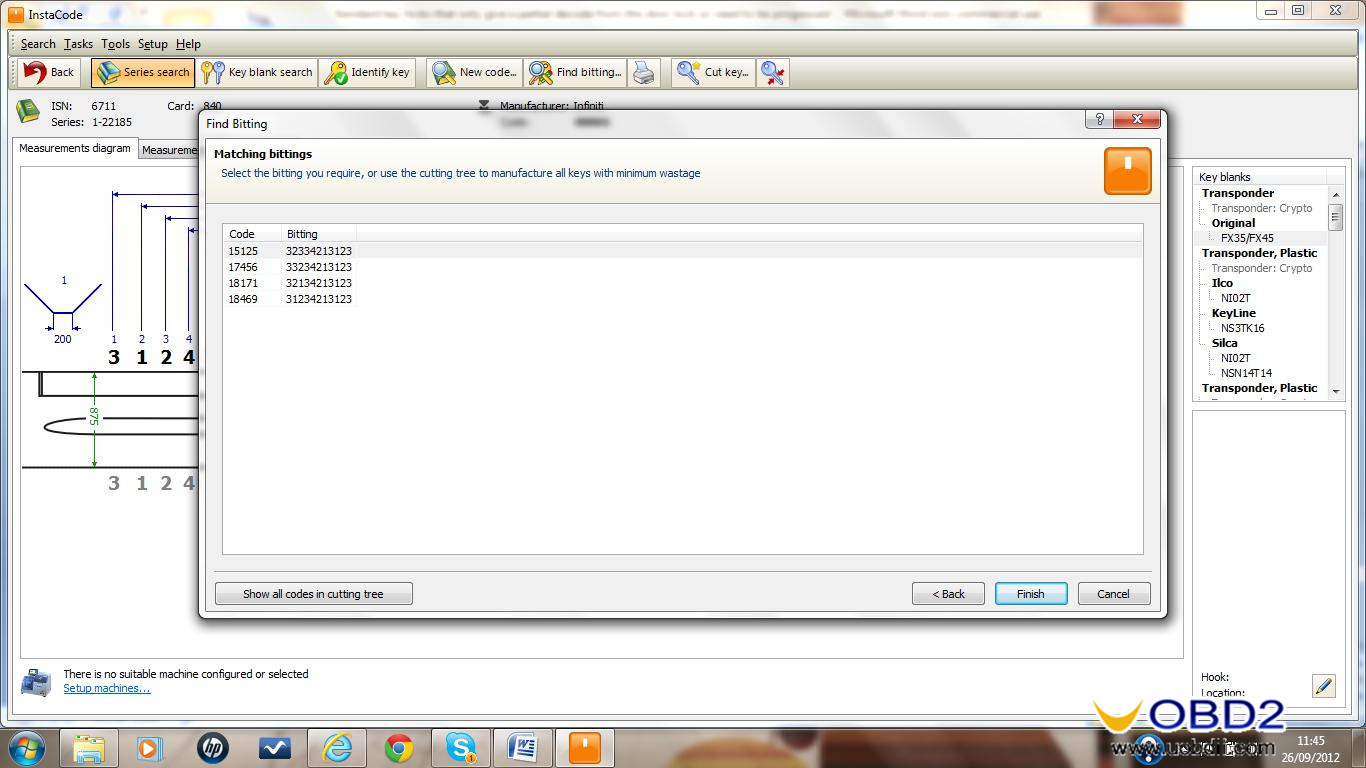
As you can see , the codes are identical to the above progression on the 10 cut key . The only difference being that each one has a No 3 cut preceding it .
This is because in the 11 cut lock , the 1st cut is a generic No 3 cut , this will be the same on every key for the current series .
You wont always know if the car you are working on has the 11 cut powered eccentric ignition on it or not , this will only become obvious after you have cut the key , which will work fine in the door lock , but will fail in the ignition lock. This isn’t a problem , all we then need do is cut the 11th cut a No 3 cut at the bow end and the ignition will then operate.
No comments:
Post a Comment